Author Archives: David Adams

Are You Prepared For a Disaster at Your Workplace?

Being prepared for a disaster means being prepared no matter where you are, not just at home.

Most Americans spend most of their time at home, while the rest of their time is largely spent at work. The average American working 40 hours a week spends about 35% of their time at work.

35% is a significant chunk of time, so it’s very likely that a disaster could happen while you’re at work.

It’s unrealistic to be as prepared at work as you are at home, but there are a few things you can do to be better prepared at work.

Take Inventory of Your Workplace Supplies

The first step to being more prepared at work is to understand what’s already available.

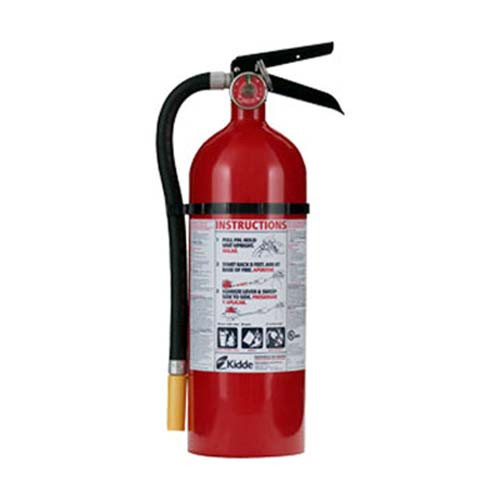
Every workplace should have at least basic survival supplies. At minimum, there should be at least one fire extinguisher and a first aid kit, for example.

Take note of where they’re located and how well stocked they are. Let someone know if supplies are running low or if you think there should be more.

This is easy to do because it’s a normal topic to bring up with your supervisors. Approach them from a “concerned employee” standpoint without seeming like  a “crazy prepper”.

Also ask about any safety procedures that are in place. There’s no telling if people will actually follow this plan if a disaster happens, but it’ll help if you have a general idea of what to expect.

Keep a Fully Stocked Bug-Out Bag in Your Car

You won’t be able to bring a fully stocked bug-out bag in to work with you, but you can keep one in your car.

If it’s possible to get to your car when a workplace disaster happens, you can just leave and get to all the stuff you need.

However, there could be a situation where it’s either impossible or just impractical to leave. For example, in a severe winter storm it might be best for you to stay overnight at work rather than risk driving.

In that case, you’ll want to have at least some supplies with you in your workplace. The problem is how to do it in a way that doesn’t draw any attention to you and won’t get you in trouble with the company.

Take Advantage of Company Lockers

If you have lockers at your workplace, then you’re in luck. Simply bring a small backpack or duffel bag with basic equipment and store it in your locker.

Companies will sometimes conduct random locker searches, so don’t keep anything in there that clearly violates company policy.

Knives should be avoided in most white collar jobs, though you might be able to get away with it at a blue collar job…especially if the knife is part of a multi-tool.

Buy an Extra-Large Lunchbox

A lunchbox can be used to store more than just your lunch. It can also store some of your survival gear.

One of the benefits of a lunchbox survival kit is that lunchboxes are a totally normal thing to have at work, so nobody will ask you about it or suspect that it’s a survival kit.

Get an extra-large lunchbox so there’s room for your survival gear and for your lunch. Keep your survival gear on the bottom where it won’t be seen, and keep your food on top.

Your co-workers will just see a normal lunchbox.

Store a Few Things in Your Pockets

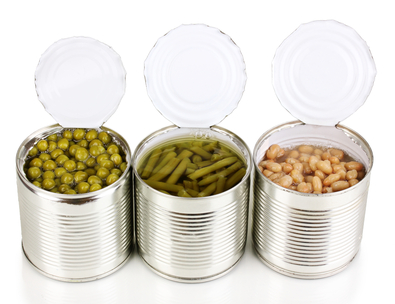
You should be able to keep a few small things in your pockets. A few small baggies of food will go a long way to curb hunger during an overnight stay.

This works best if the dress code at your workplace isn’t too strict. It’s best if you can wear cargo pants with big pockets so you can store more stuff.

However, even if you have a stricter dress code, you should still be able to find some pants with deep pockets. You won’t be able to store as much stuff, but it’s still better than nothing.

Also consider keeping a roll of quarters someplace. If the power stays on, you’ll be able to buy things from the vending machine before getting into your backup food.

Are there any tricks you know of to stay prepared at work? Let us know in the comments section below!

11 Best Survival Uses for Honey

We can’t count on having modern conveniences forever, so it makes sense to have some alternatives prepared ahead of time.

We can get a lot of useful things from nature, and one of the most useful resources is honey.

Honey has a variety of medical uses that are sometimes just as effective as regular medications.

The information in this post is simply for your knowledge and isn’t medical advice. Check with your medical professional before trying these.

Some of the uses on this list have been proven scientifically effective, and others are still considered “folk” remedies. Still, you might not have a choice in a crisis, and that’s why I’m sharing these alternative uses of honey with you.

Heals Wounds

Honey breaks down glucose sugars and makes hydrogen peroxide, which helps fight infections.

This means honey is an effective healing agent. It helps kill harmful bacteria and promotes the healing of wounds.

To get the healing benefits of honey, simply spread liquid honey over the wound and cover it with a dressing. Occasionally add more honey until the wound is healed.

Relieves Sore Throats

One of the most well-known alternative uses for honey is that it can be used to relieve sore throats. Some people say this home remedy is even more effective than over-the-counter medications.

Mix honey with freshly squeezed lemon juice and stir them together until they’re well blended. Drink the mixture and your sore throat should be completely gone, or at least reduced.

If your sore throat isn’t completely gone, simply drink more of the mixture and give it time.

Soothes Upset Stomachs

Try this home remedy to soothe an upset stomach and help digestion.

Add one tablespoon of apple cider vinegar and one tablespoon of honey to one cup of warm water. Mix them together and drink.

Your stomach ache should be gone shortly. This same remedy can also be used to relieve the pain of heartburn.

Treats Burns

Burns are one of the most dangerous injuries you can get, especially if you don’t have access to proper medical care.

You should apply a soothing agent, such as aloe vera, to the burnt area. However, if you don’t have a proper burn cream, you can use honey as a substitute, which has many of the same benefits.

Read our full blog post on treating burns here.

Relieves Allergy Symptoms

Consuming local honey every day is said to reduce your allergic reactions to local plants. The honey has to be local because local honey will be made from the pollen of local plants.

The medicinal use of honey hasn’t been scientifically proven, but enough people swear by it that it’s worth trying for yourself if you have allergy problems.

Kills Parasites

Medical treatment for parasites can be costly, and that’s assuming you have access to adequate medical treatment.

However, you might be able to get rid of parasites in your body by using a home remedy which includes honey.

Combine honey, vinegar, and water in equal amounts and mix them together. Drinking this mixture will supposedly kill the parasites in your body.

This use of honey hasn’t been completely proven, but there are a lot of individual cases which claim using this remedy got rid of parasites, so it’s worth a try.

Suppresses Coughing

Coughing isn’t necessarily a bad thing because it’s the body’s way of clearing out mucus and bacteria. However, if your coughing is excessive or causing you pain, you might want to create a natural home remedy for relief.

Make a warm cup of tea and stir in some honey. The honey will sweeten the tea and act as a natural cough suppressant.

Boosts Immune System

Honey contains “phytonutrients” that have anti-bacterial and anti-viral properties. Eating honey or drinking a honey mixture will help your body fight off infections and viruses.

You can consume honey regularly to help prevent disease, or you can consume it to fight off current infections.

Boosts Energy

Honey contains glucose, which will quickly boost your energy levels. Keeping energy levels high is especially important during a crisis when your diet probably won’t be as well rounded as it used to be.

Sugar Substitute

Honey is a good substitute for sugar. For every one cup of sugar a recipe calls for, replace it with ¾ cup of honey.

Honey and sugar react slightly differently, so you’ll have to experiment to perfect your recipe.

One of the tips people have for cooking with honey is to reduce another liquid in the recipe by ¼ cup since honey is already partly liquid. You should also reduce the oven temperature by around 25 degrees or so.

Food Preservative

Just like sugar can be used as a food preservative, honey can be used as a food preservative as well. Food preserved with honey tends to stay fresh longer.

Know any other uses for honey that aren’t listed here? Share them with our fellow preppers in the comment section below!

How to Sharpen Your Survival Knife

A survival knife is one of a prepper’s most important tools, but it also needs to be sharpened occasionally to keep its edge.

A dull survival knife is useless in a survival situation, so I’ll show you how to sharpen your knife even if you’ve never done it before.

By the end of this post you’ll have all the knowledge you need to keep your knife razor sharp so it’s ready at a moment’s notice when SHTF.

How Knife Sharpening Works

A sharp knife has a fine edge that stays consistent along the length of the blade. A dull blade has dents and tears that prevent it from cutting properly.

The metal blade of a knife wears out every time it comes into contact with another object. Over time, the blade will no longer be straight or have a fine edge.

The purpose of sharpening a knife is to straighten the blade and restore it to the ideal angle.

To sharpen your knife, you need to use another tool that’s capable of reshaping the blade.

There are several types of tools that can do this, but this blog post will focus on sharpening knives with a whetstone because that’s the most versatile method after you learn the skill.

Required Knife Sharpening Tools

You’ll need two tools to sharpen your knife.

The first is the whetstone. The whetstone is the hard block of material that grinds away unwanted metal from your knife blade.

Whetstones can be made of different materials including: diamond, ceramic, carbide, or synthetic.

Each of these materials has their own advantages, but at the end of the day they’ll all get the job done just fine. So don’t worry about picking the absolute best one. If you’re new to knife sharpening, you won’t be able to tell the difference anyway.

Whetstones also come in different grit sizes ranging from small to large and everything in between. Again, don’t get hung up on all the choices. A medium grit size is good enough for general purpose use.

The next thing you’ll need is a lubricant. The lubricant makes it easier for the knife and whetstone to slide against each other. It also stops metal shavings from clogging the whetstone’s pores and making it less effective.

The most common types of lubricants for knife sharpening are mineral oil and honing oil, which is made specifically for knife sharpening.

Mineral oil and honing oil are also good at reducing the heat caused by friction, but if you’re in the field without a proper lubricant, it’s OK to use water.

How to Sharpen Your Knife with a Whetstone

The first step to sharpening your knife is to identify the angle of the blade, or pick a new angle you want it to have.

The only way to tell what angle your knife has is to get that information from the manufacturer. If you still can’t find it, it’s OK to rework your knife with a new angle.

Any angle between 15 – 22 degrees will be good enough for general use.

The smaller the angle, the sharper your knife will be. The drawback is that a smaller angle will lose its edge faster. So choose a smaller angle if you just want the sharpest blade possible, and choose a bigger angle if you want it to last longer.

Next up is to pour a good amount of lubricant over both sides of the whetstone.

Now, begin sharpening the blade. There are two sides to the whetstone: the rough side and the fine side. We’ll use the rough side first.

Hold one edge of the knife against the stone at the angle you’ve chosen. The biggest mistake people make is not giving both sides of the edge the same angle. You can use an angle guide to do this for you, or try to do it by feel.

Now pull the blade towards you over the whetstone while applying a moderate amount of pressure onto the blade. Do this about ten times or so, and then flip the knife over to get the other side.

Now that you’ve finished the rough passes, it’s time to flip the whetstone over to use the fine side. Repeat the same steps above on the fine side of the whetstone.

Your knife should now be much sharper than when you started, though it probably won’t be perfect the first time you try it. Keep practicing and you’ll get the hang of it eventually.

If this sounds like too much work to you, you can also use pre-made knife sharpeners. They won’t produce as good of an edge as doing it yourself, but it’s quick and easy and sure beats having a dull knife.

5 Types of Campfires You Need to Know How to Build

Starting a fire can be difficult. That’s why there are so many tools designed to help you get your fire started and keep it going.

It’ll be easier for you to start a fire if you know which type of campfire you should build to suit the conditions you’re in.

If you’re struggling to start your fire because of wind, water, or even if you don’t know how to build campfires very well (or at all) yet…this post is for you.

There are several types of campfires you can make, but you really only need to know these five.

Lean-To Campfire

The lean-to fire is an easy campfire to build. Plus, it’s great for when you’re trying to start a fire on a windy day.

In this campfire, the large fuel log acts as a windshield for the tinder and kindling you’re trying to ignite.

Place a fuel log on the ground where you want your fire to be, and put your tinder alongside of it on the opposite side of where the wind is blowing from.

Now prop up small twigs of kindling against the fuel log. This kindling should have one end resting on the fuel log and one end resting on the ground with the tinder underneath it.

Now place larger sticks of kindling on top of the smaller ones. You’re all set. Now just light the tinder.

The heat from the tinder will ignite the small kindling over the top of it and gradually grow your fire. The fuel log will protect your tinder from the wind while it’s growing.

Log Cabin Campfire

The log cabin campfire takes a bit more effort to set up, but it’s easier to ignite because it allows for increased airflow.

Place your tinder on the ground where you want your campfire to be, and then start stacking sticks around it to create four walls.

When the sticks get to the same height as the tinder, lay small twigs across the opening above the tinder to use as kindling.

Stack more kindling on top and continue building the walls of the log cabin with sticks.

You might have trouble lighting the tinder while it’s under the log cabin structure. In that case, dig a medium sized hole under one side of the log cabin so you can reach your hands in.

Star Campfire

The star campfire is a good choice when you don’t have a way to cut the fuel logs down to size. Rather than waste fuel logs by throwing too much on the fire, use the star campfire to gradually feed it.

Arrange your fuel logs so that they all point together at the center like the spokes of a wheel. Make sure to leave a small opening in the center so there’s enough room to put your tinder and kindling.

The fuel logs will shield your tinder from the wind a little bit, but not as much as the lean-to campfire.

When you need to feed the fire, simply go around the campfire and push the logs inward with your foot.

Teepee Campfire

The teepee campfire is the most basic campfire that everyone is familiar with. It’s a good campfire to build under normal conditions and can be thrown together in a hurry.

Lean several sticks against each other so they form a cone shape and hold each other up. Push the ends of the sticks into the ground if you need extra stability.

Continue forming the cone shape with kindling. Leave a small opening on one side so you can insert your tinder.

Now simply ignite your tinder and insert it into the teepee structure. The heat from the tinder will rise upwards and ignite the rest of the kindling and eventually ignite the larger sticks.

Swedish Log Stove

The Swedish log stove is a unique type of campfire because it can be tied together and transported whole, and it’s also the only campfire that works while sitting in water.

First, gather several fuel logs of the same length, kindling, tinder, and a long flexible branch or strong plant stem.

Gather your kindling together and then surround it with the fuel logs. Tie everything together with the long flexible branch or durable plant stem.

Now ignite your tinder and put it into the middle of the Swedish log stove so it catches the kindling on fire.

This is great for when the ground is wet because the fire starts at the top and stays elevated off the ground by the fuel logs. And because it’s all tied together, you can move the whole thing at once.

If your fuel logs are around the same length, you can even use the Swedish log stove to set pots and pans on, which is perfect for cooking a delicious meal outdoors.

If you know of any further tricks to building these campfires, or if there are other types of campfires that you think deserve to be mentioned, please share your comments below!

How to Keep a Low Profile When SHTF

There’s going to be mass chaos when SHTF. People are going to be desperate, and they’ll go to any extreme to save themselves…even if that means attacking you or your loved ones.

Even people who were friendly and honest during civilized life won’t hesitate to turn on you if it means they’ll survive.

If you are one of the few people who are prepared for a crisis, defending yourself against those who are unprepared is going to be nearly impossible. The smarter strategy is to avoid unwanted attention altogether so you won’t be targeted in the first place.

Here are some tips on how to keep a low profile when SHTF.

Avoid Using Light Sources at Night

There probably won’t be any power when SHTF.

It’s pretty suspicious when one house has lights on while all the other houses are pitch black. That’s an obvious sign to every passerby that you have a generator or another alternative light source.

This signals to your entire neighborhood that you were prepared for something like this and that you have useful stuff.

If you think desperate people with barely any resources of their own are just going to leave you alone, think again. You can expect a horde of people to break down your door in no time.

That’s why you need to think carefully about how you use your resources. Keep your lights off at night and don’t make too much noise.

You need to blend in and make sure your house is dark and quiet just like everyone else’s.

Don’t Wear Tactical Gear in Public

What will most people be wearing when SHTF? Mostly normal looking clothes to begin with, which will gradually get more worn out as time goes on.

If you’re going out in camouflage, a big backpack, and tactical pants with lots of cargo pockets, then you’re going to stick out like a sore thumb.

If you dress in tactical gear while everyone else is in plain clothes, you’re saying, “Look at me! I have all the stuff you need!”

You can still use these things, but you have to be more careful about it. When you’re out in public, make sure your backpack looks mostly empty instead of full so it looks like your supplies are scarce.

Not all tactical pants are camouflaged and have lots of cargo pockets. You can get tactical pants that look just like regular pants but are still much more durable and protective.

Act Like Everyone Else…Scared and Helpless

It’s not just your appearance that needs to match everyone else’s…it’s your behavior too.

When SHTF, most people aren’t going to know what to do. They’ll wander around in disbelief, completely helpless. They’ll be lost and confused. You need to imitate that behavior as well as  you can.

If you look like you know what you’re doing and move with a purpose, people are going to notice that.

Someone might even follow you to spy on you to see what you’re up to. They’ll see where you keep your gear, your hiding places, and they’ll even know where you and your family live.

Keep Your Gear Out of Sight

Don’t keep anything useful outside or visible to anyone. If someone sees your gear, they’ll start thinking of ways to steal it from you.

Keep everything in your house or in you shed. Of course, keep your shed padlocked. If you’re a serious prepper, you’ll also have a camera security system in place for the entire exterior of your house. If you have to move things around, do it at night when you’ll be harder to see.

This tip isn’t just for when SHTF. It applies right now.

If people know you’re a prepper, that could mean trouble for you when SHTF. People will remember how you showed them all that stuff you got and how you were talking about being prepared.

Other than your immediate family, it’s best to avoid telling friends, coworkers, or neighbors about this stuff unless you’re sure you can trust them. If not, they could break down your door later on or steal your gear out from under you.

It might even be a government organization that steals your stuff.

Don’t Cook Strong Smelling Food

Smell is another thing that could make you a target. Nothing is more enticing than the smell of a hot fresh meal to a starving crowd.

The best option is to simply not cook food that has a strong scent. I know those hamburgers and steaks make your mouth water, but they’re too dangerous to make.

The good news is that most prepper food meant for long-term storage doesn’t have much of a smell at all.

This food usually comes in cans or airtight packages that only require the addition of water. The lack of a cooking time means there won’t be much of a smell. Here’s my favorite brand of survival food.

If you want to be extra safe, only prepare food in the middle of the night when most people are probably sleeping. Keep all doors and windows shut so no smell escapes.

Do you have any other tips for keeping a low profile when SHTF? Share your advice with your fellow preppers in the comments section below. We love to hear from you!

User Guide Instructions for the TACT Bivvy®

The TACT Bivvy® is a powerful survival tool that can save your life, even in below freezing conditions.

However, to get the most out of your TACT Bivvy®, you need to use it properly. Even though the TACT Bivvy® is simple to use, there are some tips you should follow to use it to its full potential.

How is the TACT Bivvy® Different from a Sleeping Bag?

The TACT Bivvy® is not a typical sleeping bag. It’s a special emergency-only sleeping bag designed specifically to keep you alive. Everything about the TACT Bivvy® is built for survival over comfort.

You might be shocked by how thin the TACT Bivvy® is when you first see it and wonder how it could possibly keep you warm in freezing conditions. That’s because it’s made with HeatEcho® technology, an ultra-thin reflective polyester film.

This special film reflects 90% of your own body heat back at you, which will save you in below freezing conditions where hypothermia is a very real threat.

The bright orange color of the TACT Bivvy® makes you easy to spot by rescuers who are searching for you. Our green colored Tact Bivvy® allows you to blend into most green surroundings.

How to Use the TACT Bivvy®

Using the TACT Bivvy® is easy.

First, you’ll need to pull it out of the carrying bag and then spread the bag out on the area where you want to sleep.

Next, open the TACT Bivvy® and slide inside, being careful not to be too rough on it with your shoes. Tighten the opening where you slid in to prevent air from escaping, and you’re all set.

For best results, you should be fully clothed when inside the TACT Bivvy®.

You can also use the TACT Bivvy® in combination with another sleeping bag. Simply stuff your other sleeping bag inside the TACT Bivvy®. Using the TACT Bivvy® like this can add another 15-20 degrees of warmth!

You might start to sweat after being in the TACT Bivvy® for a while. This is a sign that it’s actually working a bit too well. Open the TACT Bivvy® to let some of the hot air and moisture out. If the condensation is excessive, use a towel to stay dry.

When Not to Use the TACT Bivvy®

The TACT Bivvy® won’t be as comfortable as a typical sleeping bag.  That’s because it is purely a survival tool, not a camping accessory.

For that reason, you shouldn’t use the TACT Bivvy® in a non-emergency situation. It’s perfectly reasonable for you to test out how it works, but just understand that it’s not meant to be a fluffy, comfortable everyday sleeping bag.

If you live in a warm weather climate, you’ll want to avoid using the TACT Bivvy® unless it’s absolutely necessary. The same heat reflecting film that keeps you warm in freezing weather will make you unbearably hot and even overheat if used in warmer weather. Heatstroke can be equally life-threatening.

Keeping Your TACT Bivvy® in Good Condition

The TACT Bivvy® is durable enough to be reused repeatedly, however, you’ll need to take care of it to keep it in good condition.

The material the TACT Bivvy® is made of is designed to stretch and be waterproof, windproof, and rip resistant, but you should still handle it with care.

Be careful when getting into and out of the bag, as your shoes could potentially puncture the lining and cause the TACT Bivvy® to lose some of its effectiveness. Also, be careful of rocky ground that could puncture the TACT Bivvy®. Try to lay the Bivvy on smooth ground.

8 Survival Uses For Feathers

When SHTF, you need to consider everything around you as a valuable survival resource. It’s even better if you can find ways to use things that are renewable, such as feathers.

Feathers are a renewable natural resource you can find anywhere and are taken for granted in everyday life. However, I’d like to show you how ordinary bird feathers can be used to make useful survival gear.

Tinder

Bird feathers are very flammable, and when they’re dry, you can quickly build a fire with just a small spark. Small feathers can be used as is, but with larger feathers you should cut them into smaller pieces.

Stack the feathers in a small pile and place your fire starter at the base of the feather pile. Strike the fire starter to send sparks down a rod and directly into the feathers. The feathers will quickly catch on fire, and you can then add kindling to grow your fire.

Fishing Lures

Feathers can be used to make your own fishing lures, which work almost as well as synthetic lures. Try to find feathers that are colorful and shiny because that’s what most fish are attracted to. It’s also best if the feathers you use are fairly small.

You’ll have to experiment to find out which types of feathers attract certain types of fish. Once you do, you’ll have an easy way to catch dinner whenever you’re low on food. You’ll still need a hook and lure to go with your homemade lure.

Pillows

Have you ever slept on a genuine feather down pillow? People gladly pay lots of money for the privilege of sleeping on them…and with a bit of work, you can make your very own feather down pillow for free!

Goose feathers are what’s usually used, though any type of feather will work. It can take a while to find enough feathers to fill a pillow, but if you raise chickens, this won’t be a problem.

Before you use the pillow, stuff the feathers into a pillowcase and wash them to get the germs off. Dry them afterwards and enjoy your fluffy new pillow.

Comforters

You can also use feathers to make a feather down comforter. It’s the same process as making a feather down pillow. Just collect the feathers, stuff them into a comforter, wash them, and then enjoy.

You’ll need a lot more feathers to make a comforter, so if you don’t raise your own chickens, you can expect this process to take a while.

When making your comforter, sew sections into it so the feathers don’t all fall to one side of the comforter. Using sections keeps the feathers evenly distributed so you stay nice and warm at night.

Turkey Wing Hunting Call

Instead of waiting around for your prey to show up by chance, why not make your prey come to you?

You can make a turkey wing call out of turkey feathers that will bring them to you. A wing call mimics the flapping sound a hen makes when landing. Male turkeys hear that noise and come rushing over to greet the hen.

You’ll need to have the primary feathers of a turkey and something to attach the feathers to. You can cut up the wing bone of the turkey as the base for the call, as in the video below, or you can make your own base out of something else, such as a stick.

Writing Quills

Before modern pens were invented, we used feather quills dipped in ink.

Shave off some of the fibers so you have enough room to grip the stem, then cut off the very tip of the stem. Use a razor to cut off part of the tip so you have a pointy end to write with.

Compost

Feathers are perfectly safe to add to your compost pile.  If your chickens are healthy and don’t have any parasites, they make a nice nutrient-rich addition to your pile.

Arrows

A bow and arrow is a great weapon to have in a SHTF scenario. It’s even better if you can build your own bow, or at least make your own arrows. That way, you’ll always have a way to hunt and you’ll never run out of ammo.

Feathers can be used to make the fletch of your arrows. The fletch is what helps your arrows fly straight, fly further, and more accurately hit their target.  Turkey feathers are best for this, though you can use other feathers too.

The Holidays Are a Good Time to Start Prepping

With wildfires in the west, hurricanes lined up in the south, and a crazy guy testing hydrogen bombs that will fit on an ICBM over in North Korea, it’s quite an alarming and unpredictable time we’re living in as we head into winter.

Planning ahead means taking responsibility for your own life and not relying on the government or anyone else to give you a handout, especially when they might be overwhelmed and not able to help you survive a crisis.

This winter, we’ll most likely face blizzards and ice storms before next spring’s tornado season hits much of the country.

We all know disasters happen year-round. Will you be ready if you are in eye of the storm?

The holidays are the perfect time to start learning how to prep with simple, easy steps, such as filling any gaps in your current gear or even just adding an extra layer of gear as you prepare.

What better gift than to give someone a means to save themselves during an emergency? If you play your cards right, you might even be able to score some amazing gear for yourself this year as well.

Shelter

If you don’t have shelter in extreme conditions, you can only expect to survive for a couple hours.

Shelter is all about maintaining your body temperature, whether it’s heat in a cold environment or shade in a hot one. There are various tools to stock up on that will allow you to build or repair the shelter you’ll need in an emergency.

The quick and easy way to have on-demand access to comfortable shelter is to have a durable, waterproof tent that’s easy to set up in a hurry.

Fire

Fire starters are extremely important so you can heat, cook, and purify water. Always try to have several ways of starting a fire, so you won’t have to rely on just one method that might fail.

A good knife (or two) is another tool that has many uses in an emergency. I always suggest at least two, a large knife for heavy tasks and a small folding knife for the more delicate work.

Water

Potable water is a close second in importance to shelter when it comes to prepping. Experts will tell you that you need to plan on using one gallon per person, per day.

You might be thinking you’ll just turn on the tap and have all the water you need, but this might not be the case in an emergency. If you turn on the tap and nothing comes out, or it comes out looking or smelling funny, you’ll need to have another source of water.

There are two ways to get water: store it or collect it.

There are several products available for storing water, from relatively small jugs like WaterBricks up to 55-gallon storage barrels.

From a pocket filter up to a Big Berkey, a water filter is something every prepper should invest in. I’ve owned a Big Berkey for 15 years, and have used it to filter rainwater from my roof for a week after an ice storm.

If you’d rather collect your water on an as-needed basis, the Sawyer Mini is one of the very best portable water filters available. It’s small enough to fit in the palm of your hand, and makes a great stocking stuffer for your loved ones.

I can’t stress enough how important it is to have clean water in an emergency.

Food

It’s no surprise food is usually the first thing people think about when they start prepping. They might’ve had a power outage and were unable to buy food for a day or two and found out how quickly their cupboards ran dry.

If you look into survival food, there is a wide variety you can buy.

From individual freeze-dried meals in pouches to MREs to food pails or 72-hour kits that come with a three-day supply of food, there is no shortage of survival food a prepper should stock up on.

After the canned food in your pantry is all gone, these survival foods will see you through almost any crisis and they’ll store for many years before you even have to think about replacing them.

Power

While some people invest in a whole-house generator, others invest in solar chargers and backup energy storage devices for charging their electronics.

I personally have a BioLite BaseCamp so I can charge my electronic devices with sticks that I pick up off of the ground.

Most of these devices come with a car charger, but you may find that after a time fuel is scarce and you might not be able to use your car for charging as often as you’d like.

Communications

In any crisis, you’ll want to stay current on any announcements being made over the radio.

In this situation, your phone might not get a signal if too many towers have been damaged or are without power. In some cases, the system may be too overloaded for you to get useful information.

When this happens, an emergency radio is the way to go. They usually have a means of recharging themselves and they cover almost every band available, so if there is a signal being sent, there’s a good chance you’ll pick it up.

Survival Kits

There are pre-made kits for many situations from home to car and even for your pets.

Prepper or not, everyone should invest in a good first aid kit. Even common household accidents can be treated more easily if you have everything in a complete kit.

Speaking of first aid, if you have a prescription to anything, you’ll need to plan ahead in case you can’t fill it right away. Speak with your doctor to find out what options are available in an emergency.

If you have to leave

If staying in your home becomes unsafe, you’ll have to leave. In this case, it’s a good idea to have camping gear available.

All the things we have looked at so far can also be picked up for a camping type situation. In a crisis, kids will handle it much better if you can put a positive spin on it, and what’s more fun for a kid than going on a camping trip?

You can pick up prepacked survival kits, or pick and choose your equipment to make your own custom survival kit.

New Equipment

The holiday season is a good time to check out new equipment you might not have thought about before. I always like to buy a new piece of equipment just to see how it works for me.

If you are just learning how to prep, a new item is just what you need to get yourself on the path to being fully prepared.

The holiday season is traditionally a time where we sit back and enjoy the fruit of our labor and exchange gifts heading into the winter season.

Why not give some serious thought to your future by buying your family a little peace of mind?

Investing in new survival gear and learning some survival skills will go a long way towards keeping you and your family safe.

‘Tis the season to share your prepping gifts with others.

Emergency Cooking With Portable Stoves

Emergency Cooking Stoves

In any emergency situation a hot meal is something that will definitely bring down the stress level. The problem is, if there is an emergency, there is a good chance you may be without power and can’t make a hot meal.

The solution may just come in the form of a portable stove. These stoves are designed for backpacking, camping or emergency use, and they come in many forms and use several different fuels.


Solid Fuel Portable Emergency Stove

Click Here to Learn more about this Portable Stove

Emergency food

Emergency food, along with backpacking and camping food is usually dehydrated or freeze dried. This means that you are basically boiling water to cook it. Some of these stoves can barely do that, while others will cook just as well as the stovetop in your kitchen.


Sterno/ canned fuel

Used mainly by caterers to keep serving dishes warm at events, canned fuel can be used in folding stoves and will boil water as long as there isn’t a strong wind to keep the water cool.

They are safe to use indoors, and the fuel can be bought in most camping departments.


Candles

Without power you may be burning candles for light and heat. With some of the multiple wick emergency candles you can rig up a cooking surface you boil your water. Not the fastest way to get the job done but it should get there in the end.

Emergency Survival Candle

Click Here to Learn More about this 36-Hour Emergency Survival Candle

Butane

Another indoor safe stove is a butane stove that uses canned butane for fuel. I have had one of these for about 25 years and love it. It will boil water as fast as your home stove, and is more than capable of frying.

They are usually a one burner affair that produces a flame very similar to natural gas. The fuel can be expensive if it is your only source of cooking for an extended period of time. I have used mine in several short term power outages and camping trips and have only gone through a few canisters of fuel in all this time.


Kerosene

My grandmother used a kerosene stove for canning, and I still have it in my basement. I have seen several similar stoves in antique stores, and if you look around on the internet you will be able to find replacement parts.

Another neat way to cook with kerosene is to get a convertible lantern. This lantern will allow you to cook on top of it, making a multi purpose tool.


Propane

You can find many different types of propane backpacking and camping stoves. The fuel is readily available and stores pretty well as long you can keep the canisters from rusting or exploding.

A portable propane stove is not generally safe to use indoors.

Another source of cooking with propane will be your gas grill. Many different types of food can be cooked on a grill if you just learn how.


Emergency Propane Stove

Click Here to Learn More about this Single Burner Propane Stove

Whitegas Stove

My first survival stove was a coleman stove. While (in my opinion) not as good as the butane stove mentioned above, they have produced millions of these camp cooking stoves, and a lot of people use them.

I have found them to be a little temperamental, and they require close supervision when cooking, but they will surely get the job done if you know how to use one efficiently. These stoves should be used in a well ventilated area.

They also make small backpacking stoves that use whitegas. They can also be temperamental if you don’t know what you are doing. If you plan on relying on one of these stoves for your emergency cooking you will want to make sure you get plenty of practice beforehand.


Wood/ Charcoal

Wood is our most basic cooking fuel and can be utilized in many different portable cook stoves.

From a Kelty Kettle to a Volcano stove there are many innovative ways to use it. If you run out of charcoal for your grill you can use wood instead. I do it quite often.

One of the newer wood stoves to hit the market is a stove that uses wood to cook with but also has an incorporated thermopile that turns the heat into electrical power. The Biolite company has started making several products using this thermopile technology. They make a backpacking/ camping stove along with a “Base Camp” stove (which I have) that will charge your phone or other electronics in an emergency.

BioLite Camping Stove

Click Here to Learn More about the BioLite CampStove

Baking

I have with my afore mentioned antique kerosene stove a stovetop oven that sits on top of a burner and allows you to bake in an emergency. I am surprised these are not more popular in the survival community. These are still available and are relatively inexpensive.


Safety

One of your survival supplies should be a carbon monoxide detector. If you plan on doing any alternative cooking inside, this is essential so that your entire family doesn’t wake up dead.

Carbon Monoxide Smoke Alarm

Click Here for More Information on this Carbon Monoxide / Smoke Combo Alarm

You will also need to have a good charged fire extinguisher or two on hand whenever cooking, lacking this, a large box of baking soda.

Fire Extinguisher


You will also need to find a safe place to store fuel for your stove. If possible this should be away from your living area, so there is no chance of burning down your shelter in case of an accident.

One last bit of safety to consider. If you are in a serious survival situation a nice meal of fresh bread and BBQ might be just the ticket to brighten up your world, but if you have food and others don’t, the savory aroma wafting out of your home will draw hungry people like flies. If you are running a soup kitchen for refugees this is a good thing, if you are trying to maintain a low profile and take care of your family it may be life and death. Think before you cook.

As you can see there are many different ways that you should be able to cook just about any type of meal you can think of with a portable stove.


Click Here to Check out a full line of various Survival Stoves


Where to Find Hidden Water in Your Home

During a disaster potable water is at a premium. Once domestic services start going out you can no longer turn on a tap and take a drink.

Besides obvious places like your backyard pool there are hidden reservoirs of water in most homes


So how do you find hidden water in your home during an emergency?


Pipes

Even when the water stops coming in, your pipes can still hold up to several gallons depending on the size of your home.

You will be able to access this water by turning on the lowest spigot in the house and letting the water gravity feed. Once this is gone you can sometimes open an upper spigot as well and that will release any water that may be vapor locked in the system.

If you still run out you can find the water inlet into your home and open it there (you may have to cut the pipe. If you do this turn off the inlet valve first. After this water is gone open the valve and see if any more will trickle in.

Water Heater

Unless you have gone the on demand water heater route your tanked heater will have between 40 and 80 gallons in it. You can access it by opening the drain valve at the bottom of the tank.

Hidden Water in Toilet

Toilet Tank

Most toilet tanks hold around a gallon of water in the back tank. This water is clean as it has not been in contact with the bowl.

Dehumidifier

If you live in a humid climate you may run a dehumidifier to keep humidity levels lower in your home. If it is the catch basin type you may have a supply of water if you haven’t dumped it lately. If you have the type with a drain pipe you can tap into this and see if there is any water.

If you happen to have power but not domestic water a dehumidifier will give you distilled water from the atmosphere.

Humidifier

In the winter many people run a humidifier. These are another source of water in your home. If you have the old style that has a fan the blows through a rotating cloth or mat you should purify the water before drinking since little beasties like to grow in dark wet environments.

Swamp Cooler

If you live in a dry climate you may have a swamp cooler. Many swamp coolers work like a
humidifier that is run in the winter. They may have a reservoir of water.

Hidden Water in Canned Foods

Open tin cans of french bean, beans and peas isolated on white

Canned Foods

Canned vegetables and even tuna (packed in water) have drinkable water in them. Most people just dump it down the drain but in a survival situation this stuff is life. It may be slightly high in sodium depending on what veggies you have but it is better than nothing.

Hidden h2o in Waterbed

Water Beds

The gallons of water available in a water bed are not good for drinking (but may be used for other things to save your drinking water). This water is treated with all kinds of chemicals to keep algae and bacteria from growing in it.

Roof

If all else fails you can collect rain water from your roof. It is best to filter it since you never know what those birds are doing to your roof while you aren’t looking.

As you can see there are many sources of water in almost every home. If you are smart and conserve what you have available you should be able to get through most disruptions to your domestic services.

If you want to always have a safe and clean supply of water, consider picking up a few WaterBricks. Each brick stores 3.5 gallons of water (or food or ammo!) and they are made to stack easily like Legos. Their easy grip handles also make them easy to grab n’ go in an emergency.

 Learn more about the WaterBricks.

WaterBrick_Standard_Pair_Spigot_1024x1024 (1)