
Preparing Containers For Survival The Right Way Is Vital For Good Health
Many of the preppers I know rely on already used containers for their survival stockpile.
It makes sense really, why throw containers away when they have perfectly good uses for storing things like survival food, water, batteries, electronics and more?
And even if you’re not using the containers right now they’ll probably prove useful later on if SHTF. However before you start using these containers for storage, it’s important you know a few essential bits of information when it comes to using containers for survival.
If you want to stay healthy and you want to make sure your containers don’t end up ruining whatever you’re storing in them then I suggest reading through the rest of this blog post so you can run through this small checklist of sorts.
Doing so will guarantee any container you include in your prep kit will keep you, your gear, and your mind safe.
Follow These Tips For Properly Preparing Containers For Survival
https://www.youtube.com/watch?v=dbNNitnMuww
1 – Determine what the container is going to be used for.
Say for instance you’ve got a bunch of clean water you’d like to store for a few years. The first thing you want to do is assess whether the container you plan on using is safe for water storage.
If a container is made out of glass, or stone (and is properly cleaned) then it’ll work decently for water storage.
However, both glass and stone are fragile and generally quite heavy…so you’d be better off storing it in a plastic container.
Now that you’ve selected plastic you’ll want to ensure it’s the right kind of plastic.
That’s right, any old plastic won’t do. Some plastics will break down when exposed to water, and that means the toxic chemicals used to make the plastic can end up in your water. Not good. So make sure to get a food safe container for water and food.
Now just because you picked a food safe plastic doesn’t mean you’re completely out of the woods.
That’s because not all “food safe” plastics are actually food safe. Many of them contain a chemical known as BPA in them. BPA, or bisphenol A, is a chemical used in the production of plastics that can also leach out into food, or water (when the plastic’s heated) and has the known ability to disrupt your body’s hormones and can cause cancer.
So it’s imperative to get containers without BPA.
Want to know how you can tell if your container’s got BPA in it? Just look at the imprinted recycle symbol on the bottom. The number 7 means it contains BPA.
The next part of this step is determining if the container can actually do the job you’re tasking it with.
What does that mean?
Let’s go back to the example of storing water again. Certain containers won’t be able to stand up to storing water for a long period of time.
For instance people think they can use 1 gallon water jugs to store water indefinitely. Well the bad news is you can’t. Lightweight plastic containers will eventually dissolve and the water you’re storing in them will seep out causing you to lose your gear.
Or let’s say you want to store ammunition in a lightweight plastic container, or a shoebox even. Do you think those containers will be able to hold up to the weight of 50 lbs. of ammo, especially if you’re forced to move the ammo over long distances for long period of time?
Definitely not. That’s why it’s important you think long and hard about what you’re going to use the container for.
Here are some quick tips on which containers are best suited for which uses.
- Canned foods: Sealable metal containers
- Picked Foods: Sealable glass containers
- Dry foods: BPA free plastics containers, stone, ceramic, glass containers
- Electronics: Durable, sealable plastic containers
- Ammunition: Durable, lightweight plastic containers, Durable metal containers
- Water: Durable, BPA free plastic containers, glass, stone, ceramic
- Medical kits: Durable, lightweight plastic containers
- Seeds: Durable, lightweight plastic containers, glass, stone, ceramic
That should give you an idea of which uses certain containers are best suited for.
Now let me show you to make sure those containers are clean, and safe enough for re-use.
2 – Properly Preparing Containers For Survival
Odds are the most of the containers you use for storage are going to be leftover from a previous use, or might have been used by someone else and obtained at Goodwill or a similar style consignment store.
If that happens to be the case then you’ll want to do everything you can to make sure your containers are properly sanitized and clean/safe enough for continued use.
Cleaning a container properly depends on two considerations.
- What are you going to be storing in it and what was stored in it previously?
- What is it made of?
If you’re putting food or water in a container then you want it to be thoroughly cleaned…to the point where it can’t support the growth of microbial organism that’ll affect your health down the road.
If you’re storing dry goods or physical products then you won’t need to worry as much about bacteria, but a thorough cleansing and drying will be necessary to ensure the products stay protected from moisture.
Let’s go through by container type so you get a full understanding of what a thorough cleaning of each entails.
Glass containers:
The first thing you’ll want to do is sterilize the container with hot and soapy water. If you’re using the container for anything besides food or water that should be enough.
However, if food or water are going to come in play then consider using a bit of bleach to kill all signs of bacterial life. Use a a 10:1 water to bleach solution and then soak the container in there for 10-30 seconds to blast away all chances of bacteria clinging to life.
Note: If you plan on using glass containers for pickling or storing food or water always check the container for signs of cracks or chips. Heat, cold, or vibration cause eventually cause these cracks or chips to grow and then cause the container to shatter, rendering your storage solution ineffective.
Stoner or Ceramic containers:
These containers are great for fermenting and pickling foods as well as working splendidly for long-term food storage.
If you plan on using the container for food storage then following the same directions listed for glass containers is suitable.
If you plan on using it for dry good then hot soap and water is fine.
If you plan on using the containers for food or water then you’ll want to make sure the container you’re using is free of obvious cracks or chips. The reason for this is because bacteria can stay hidden and protected in those areas and make you really sick later on.
Heavyweight plastics:
We can define these types of plastics as containers made out of thick, tough plastic. Think 5 gallon buckets or any kind of plastic you’d have a tough time bending out of shape.
For the most part I recommend going back to step 1 and considering what was in the container before you clean it and then considering what you’re going to put in it later. A plastic container which at one time contained harsh chemicals shouldn’t be used for food or water storage…even if you clean it 100+ times.
However, if you’re using it for other purposes (unrelated to food or water) then you can safely use it when you follow these instructions.
For the most part hot and soapy water is enough for a thorough cleaning. If you’re going to put food in there a 10 to 1 bleach solution will help…but only do that if the container never once contained volatile chemicals in it beforehand.
Lightweight plastics:
Think deli meat containers, butter bowls, and any container you could easily crush with your hand.
For the most part these containers are worthless for food and water storage so you don’t need to clean them the same way you would containers who are being cleaned for that intended use.
Just a little bit of hot, soapy water and you’re good to go.
With this knowledge you’re now prepared to safely store all of your survival gear.
My Personal Recommendation for Food, Water and Ammo Storage?
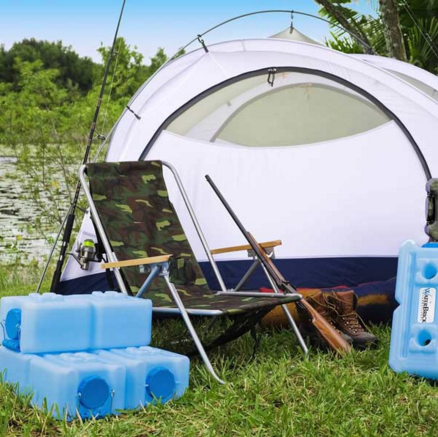
My favorite container for survival use is the WaterBrick. I consider it the future of water, food, and ammo storage.
The WaterBrick isn’t like other storage containers, especially ones that you’re recycling from home.
It’s hands down the strongest, most convenient, easiest to use storage container out there.
Here’s what makes it so darn awesome:
- Easy to carry: The WaterBrick has comfortable swing grip handles so carrying them is a breeze.
- Stackable: WaterBricks lock together like Legos so you can stack them on top of each other helping you save space while keeping your valuable survival supplies safe.
- Safe for use: The WaterBrick is made of BPA-Free plastic meaning no need to worry about harmful chemicals in your water or food.
If you’re interested in the WaterBrick then you’ll be happy to know we have the lowest prices on the WaterBrick around.
To see a cool video showing you how these work click here or on the image below.
I have found large peanut butter or half gallon or gallon mayonnaise jars are quite satisfactory for storage. The plastic is peta(1) and is fairly durable. The large mouth allows me to place large articles inside and I can reach my hand all the way to the bottom. One quart glass Ball or Mason jars are perfect for storing food. After I fill them with what I want to store I wrap the jar in bubble wrap that I receive as packing in various on-line purchases. You can also use bubble wrap envelopes, cut them open and then cut to size. I wrap it around the jar and on the bottom. This protects the jar from breakage. For water storage, I buy cheap wine in 1 gallon jugs. Locally I can buy 1 gallon of cheap wine for $8.00. The cheapest 1 gallon glass jar I have found was $13.00 at the water store. It doesn’t take a Phd in advanced math to see which is cheapest. If you don’t drink cheap wine, just pour it down the drain and still save yourself $5.00. I also wrap the gallon jars in bubble wrap to protect them. After I sanitize them with clorox solution I fill them with distilled water from the water store. It is 60¢ a gallon, cheaper than bottled water. I keep the gallon jugs in cardboard containers so that they are out of the light and out of sight of folks who are walking by and looking into my garage. I don’t worry about how old the water is because I can always pasteurize it when I want to drink it. It will be clean, free of chemicals and eminently drinkable. If you want to use 5-gallon plastic pails, see if you can beg them from a local bakery. They will be food grade and suitable for storage. If you buy them, be sure to buy food grade pails with screw on lids. The screw on are easier to manipulate than the press on. You can buy an opener for the press on lids at big box hardware stores for a very nominal fee. Even if you are storing clothes or toilet paper in a 5-gallon bucket, you want to be very careful about what was in the bucket before you got it. I wouldn’t store anything in a used 5-gallon bucket unless I knew absolutely what had been in it before I acquired it. I prefer new. In my view it’s worth the cost.